When you first use Zoom or WebEx on a Mac, you will need to grant it access to your Microphone and Camera in Privacy and Security; you will all need to do this for Screen Recording to share your screen. Once enabled, you will need to completely quit Zoom or WebEx and reopen. The user will also need to give permissions in this panel to share their screen after attempting to screen share for the first time
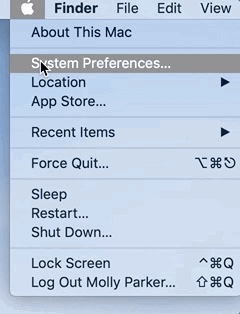
Click the Apple logo at the top left corner of your screen.
Click System Preferences.
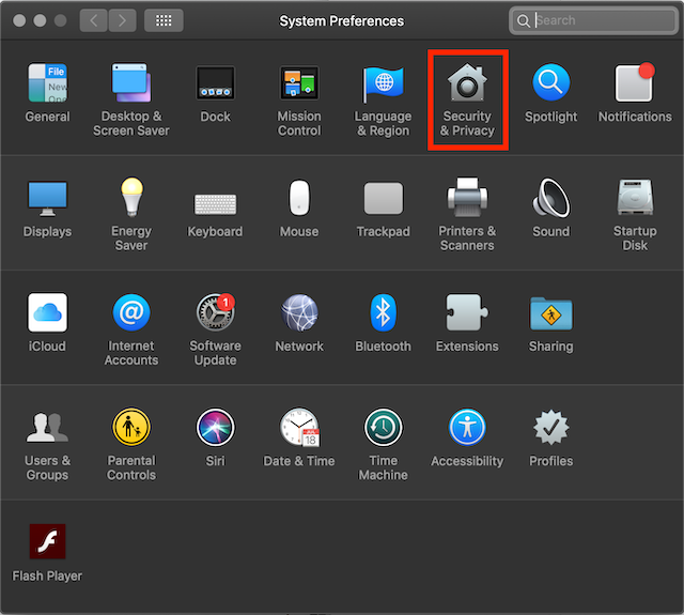
Click Security & Privacy.
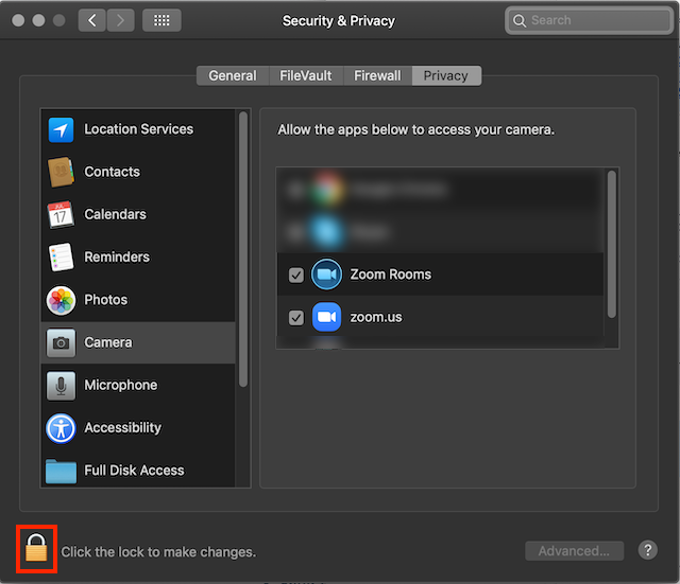
Select the Privacy tab
At the bottom-left corner of the Security & Privacy window, click the lock icon to make changes.
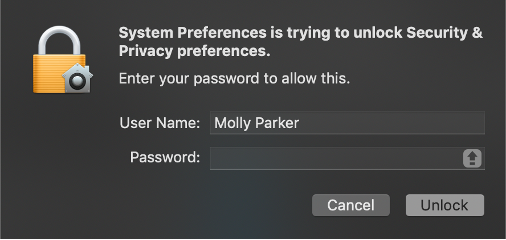
Enter your OS administrator username and password, then click Unlock.
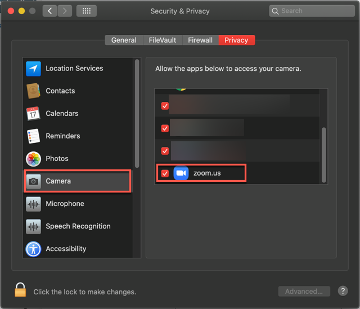
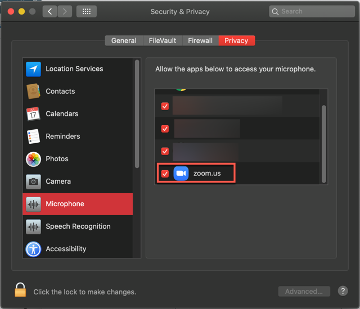
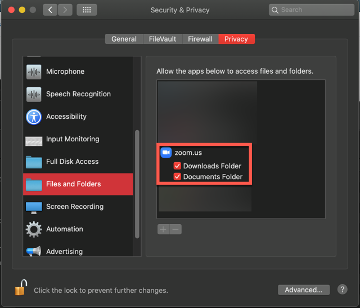
Click the permission that you need to change Camera, Microphone, Screen Recording, Files and Folders, or Accessibility.
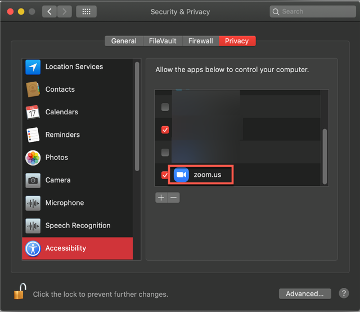
Click the checkbox next to zoom.us and/or Zoom Rooms.
Note: For Local Recording on Catalina, you need to click the checkbox for at least the Documents Folder option under zoom.us.
A window will appear asking you to restart Zoom or the Zoom Rooms application. If you need to allow other permissions, click Later and repeat steps 7 and 8 for any additional permissions you need to enable.
Once you've allowed all necessary permissions, click Quit Now.
Permissions for the Zoom desktop client
The Zoom desktop client may ask you to authorize access to the following permissions, depending on which features you are accessing in Zoom:
Camera - For sharing your video in a meeting or webinar
Microphone - For joining computer audio in a meeting or webinar
Screen Recording (Mac OS 10.15 Catalina and higher) - For sharing your screen in a meeting or webinar

Files and Folders (Mac OS 10.15 Catalina and higher) - For sharing and saving files from chat in a meeting or webinar, as well as recording locally to your computer.
Accessibility - For allowing remote control in a meeting